
When a leak is hidden behind hoses or under an intake manifold, a quick visual check may leave you guessing. A correctly prepared smoke test gives your workshop a visible starting point for a targeted repair.
To use a smoke leak detector on a car, turn off the engine, connect the tester to an approved access point, seal the required openings, and introduce smoke at the pressure specified for that vehicle system. Inspect for smoke escaping from hoses, seals, fittings, or other components, then repair and retest.
The connection point and preparation depend on what you are testing. An intake manifold, EVAP system, and turbo charge pipe require different setups. Choosing the correct test boundary matters as much as finding the smoke.
A smoke test is particularly useful when a visual inspection cannot explain a rough idle, suspected intake leak, emissions warning, or loss of boost. It turns an otherwise invisible leakage path into something a technician can trace.
What Does an Automotive Smoke Leak Detector Do?
An automotive smoke leak detector is a diagnostic tool that introduces visible smoke into a vehicle system to help technicians locate leaks.
The tester supplies smoke through a hose and adapter. When the test area is properly isolated, smoke escaping from an unintended opening identifies a potential leak location.
However, smoke can also leave through normal vents, open valves, or an incorrectly sealed adapter. Finding smoke is the start of diagnosis; the technician still needs to establish whether that opening should be sealed under the test conditions.
For more background on workshop applications, see Is the Smoke Leak Detector Really Useful?
When Should You Smoke Test a Car?
Use a smoke test when the diagnostic evidence points toward a leak in a system that can be tested with compatible equipment.
- Rough idle with suspected unmetered air entering the engine.
- Lean fuel-trim readings that suggest an intake or vacuum leak.
- EVAP leak-related diagnostic trouble codes.
- Suspected leakage around intake gaskets or hose connections.
- Loose turbo piping, damaged charge hoses, or intercooler connections.
- Suspected exhaust leaks that are difficult to see.
A trouble code does not identify the failed component by itself. Review scan data, service information, and the system layout before connecting the machine.
For example, a technician investigating a rough idle may smoke test the intake after checking fuel trims. An EVAP complaint instead requires attention to the fuel vapor circuit, purge valve, vent valve, and vehicle-specific test procedure.
What Systems Can You Test?
Smoke testing is commonly used for intake, vacuum, EVAP, and compatible exhaust systems. Other applications require confirmation that the machine, adapters, and test procedure suit the system.
| System | What to inspect | Important limitation |
|---|---|---|
| Intake system | Ducts, manifold joints, gaskets, hose connections | Identify which branches belong inside the test area. |
| Vacuum system | Hoses, fittings, PCV connections, related seals | Check valves can prevent smoke from reaching some branches. |
| EVAP system | Vapor lines, filler connections, canister fittings, valve seals | Follow vehicle requirements for pressure, gas source, and valve control. |
| Turbo system | Charge pipes, couplers, intercooler joints | A low-pressure smoke test may miss leaks that open under boost. |
| Exhaust system | Flanges, joints, welds, flex sections | Test with the engine off and exhaust cool. |
| Fuel-related systems | Compatible fuel vapor passages and tank connections | Do not treat smoke testing as a fuel injection pressure test. |
| Cooling system | Only components approved for the specific smoke test procedure | Smoke testing does not replace coolant pressure testing. |
What You Need Before Starting
Prepare the equipment before opening any vehicle connections:
- A compatible automotive smoke machine.
- The smoke fluid specified by the machine manufacturer.
- Suitable adapters, plugs, and caps.
- The power source specified in the tester instructions.
- A flashlight and inspection mirror.
- Vehicle service information.
- A scan tool when valve actuation or diagnostic data is needed.
- Pressure regulation and measurement equipment where required.
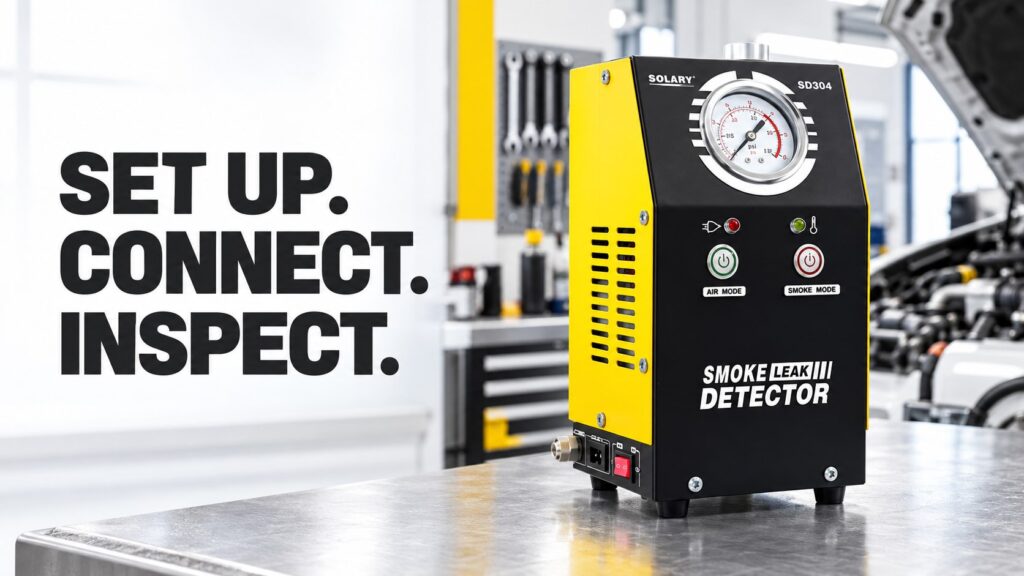
The SOLARY SD304 Smoke Leak Detector combines a built-in air pump, Air Mode, Smoke Mode, an integrated pressure gauge, and a compact design. The gauge provides pressure feedback during compatible tests; it does not automatically establish a safe pressure for every vehicle system.
Confirm application compatibility before connecting the unit, particularly for EVAP testing. A machine’s catalog output pressure should never be treated as a universal vehicle test setting.
Prepare the Vehicle and Tester
Park securely in a ventilated work area. Turn off the engine and allow hot components to cool. Keep ignition sources away from fuel vapor testing.
Fill the tester only with its approved fluid and follow the specified fill amount. Do not substitute brake cleaner, fuel, or other improvised liquids.
SOLARY’s article on What Is the Right Oil to Use in an EVAP Machine? discusses fluid selection. The instructions for your specific tester remain the deciding reference.
How to Use a Smoke Leak Detector on a Car: Step by Step
Step 1: Define the System You Are Testing
Start with a clear diagnostic question: are you checking the intake manifold, an individual vacuum branch, the fuel vapor system, or the charge-air piping?
Trace the system and identify normal openings, check valves, and connected branches. Decide which components should receive smoke and which must be isolated.
Testing an undefined collection of connected hoses can produce smoke in several places without answering the original question.
Step 2: Choose the Correct Connection Point
Connect through an access point that allows smoke to reach the suspected area without bypassing it.
| Test | Possible connection point, subject to service information |
|---|---|
| Intake or vacuum leak test | An approved manifold vacuum connection or intake adapter |
| EVAP leak test | A service port or designated vapor-line connection |
| Turbo charge-air test | A suitable adapter in the isolated charge-air circuit |
| Exhaust leak test | A compatible tailpipe adapter or specified access point |
Not every vehicle has an EVAP service port. Connection location also affects whether a purge valve, check valve, or other component blocks the smoke path. Use an adapter that seals securely without damaging the fitting.
Step 3: Seal Required Openings
Install the plugs and caps required by the test procedure. Confirm that the machine hose and adapter connections are airtight.
For an intake test, account for PCV and other connected passages. For EVAP testing, establish the prescribed purge and vent valve positions.
Do not indiscriminately block every opening. Some procedures require allowing air to leave while smoke fills the system, then closing the designated opening. Follow the applicable vehicle and equipment instructions.
Step 4: Confirm Pressure Compatibility
Use the vehicle manufacturer’s test-pressure requirement and the tester’s operating instructions. Never assume that a machine’s maximum output is appropriate for the system.
If pressure regulation or additional monitoring is required, use a suitable setup before introducing air or smoke. If compatibility cannot be established, stop and select equipment approved for the procedure.
Air Mode can support preliminary testing. On the SD304, observe the integrated gauge according to the operating instructions. Airflow alone does not prove that a system holds pressure, and pressure behavior must be interpreted against the test setup.
Step 5: Introduce Smoke
Activate Smoke Mode according to the machine instructions. Allow smoke to reach the area being tested while monitoring the setup.
Begin inspecting accessible connections as smoke enters. Check that the adapter remains sealed and that plugs stay secure.
If the tester activates its temperature protection, follow its cooling and restart instructions. Do not bypass the protection or repeatedly restart the unit.
Step 6: Trace Escaping Smoke
Move through the circuit systematically. Inspect hose undersides, connector joints, gasket edges, and areas hidden behind brackets.
Use a flashlight from different angles. A faint stream can be easier to see against a contrasting background.
Follow the smoke back to its origin. Air movement can carry smoke away from the actual opening, making a nearby component appear responsible.
Step 7: Repair and Repeat the Test
Repair the confirmed fault and repeat the test using the same connection point, isolation method, and approved conditions.
Continue checking for additional leaks. A larger opening can release most of the smoke and make a smaller leak less visible.
Step 8: Restore the Vehicle
Remove every temporary plug, cap, and adapter. Reconnect hoses, valves, electrical connectors, and service-port components.
Then complete the appropriate operational checks. These may include reviewing fuel trims, checking idle quality, or running the prescribed EVAP verification procedure.
An engine-off smoke test verifies leakage under the test conditions. It does not independently confirm every aspect of vehicle operation.
How to Smoke Test an Intake Manifold for Vacuum Leaks
For an intake manifold smoke test, introduce smoke through an approved connection and inspect the manifold, attached hoses, and seals within the defined test area.
- Intake manifold gasket edges.
- Throttle-body connections.
- Vacuum hose elbows and tees.
- PCV hoses and connections.
- Brake booster vacuum plumbing.
- Injector seals where relevant to the engine design.
A typical diagnostic situation is a rough idle accompanied by fuel-trim behavior consistent with unmetered air. Smoke can help locate a leakage path, but the result should be compared with scan data and the engine layout.
Check valves may isolate a branch from the main test. If smoke never reaches the suspected component, test that section separately according to service information.
Smoke entering the crankcase through a connected PCV route does not automatically establish a failed manifold gasket.
How to Use a Smoke Machine for EVAP Leaks
EVAP smoke testing checks the fuel vapor system for unintended leakage. The technician must use a compatible tester and follow the vehicle’s requirements for connection, pressure, test medium, and valve control.
Inspect vapor hoses, quick-connect fittings, filler components, canister connections, and valve housings. A smoke leak at a fitting should be traced to the exact seal or joint before replacing parts.
Two setup errors can mislead diagnosis:
- An open vent path: smoke may leave through a normal opening because the system was not placed in its required test state.
- A blocked smoke path: a valve may prevent smoke from reaching the section you intended to inspect.
Follow any requirement for an inert gas source. A built-in air pump alone does not establish that a machine meets every vehicle manufacturer’s EVAP procedure.
Also distinguish external leakage from valve operation. A purge valve can have an internal sealing problem without producing an obvious external smoke plume.
Can Smoke Testing Find Turbo and Exhaust Leaks?
Turbo Charge Pipes and Intercooler Connections
A smoke test can reveal openings at charge-pipe joints, rubber couplers, and intercooler connections when the charge-air circuit is correctly isolated.
However, some leaks open only under boost pressure or component movement. Finding no leak during a low-pressure smoke test does not rule out a boost-dependent fault.
Use a separate regulated pressure test when the vehicle procedure calls for one. Do not increase pressure simply to imitate boost without an approved test setup.
Exhaust Joints and Flex Sections
On a cool exhaust system, smoke can help locate leakage at flanges, welds, and flex sections.
Valve positions and engine design may allow smoke to travel beyond the exhaust section being inspected. Interpret the result against the system layout.
A cold test can also miss leakage that develops only after thermal expansion. If the complaint remains, continue with the vehicle’s diagnostic procedure.
How to Interpret Smoke Test Results
| Observation | Possible explanation | Next action |
|---|---|---|
| Smoke escapes from a cracked hose | External leakage in the tested circuit | Repair the hose and retest. |
| Smoke appears around the test adapter | Poor adapter seal | Correct the connection before judging the vehicle. |
| Smoke leaves a normal vent | Incorrect isolation or valve state | Review the required setup. |
| No smoke reaches the suspected area | Blocked path, closed valve, or unsuitable connection | Confirm smoke delivery and test boundaries. |
| No external smoke is visible | No visible leak under current conditions, or an incomplete test | Verify setup and perform other prescribed checks. |
| Leakage changes when a hose is gently moved | Possible intermittent crack or loose connection | Inspect without forcing fragile components. |
No visible smoke is not, by itself, proof that the entire system is leak-free. Confirm that smoke reached the intended area and that the test conditions were appropriate.
Practical Tips for Auto Repair Shops
Check the easiest connections first, then work toward less accessible components. Photograph confirmed leak locations and record the test setup on the repair order.
Keep adapters organized by application. A smoke leak detector for cars with pressure monitoring becomes more useful when technicians have the correct fittings and can identify suitable connection points quickly.
For workshops and equipment buyers, evaluate application coverage alongside portability, fluid requirements, pressure compatibility, and operating instructions. A feature list alone does not explain how equipment fits a particular diagnostic procedure.
Conclusion
Knowing how to use a smoke leak detector on a car means controlling the complete test: choose the correct connection, define the test area, use approved conditions, trace escaping smoke, and verify the repair.
For workshops evaluating equipment, the SOLARY SD304 automotive smoke leak detector offers a built-in air pump, Air and Smoke modes, an integrated pressure gauge, and a compact design. Repair shops, distributors, and importers can review the product details and contact SOLARY to discuss application compatibility and purchasing requirements.
Frequently Asked Questions
Do you smoke test a car with the engine running?
The procedures described here use an engine-off test. Follow the vehicle and tester instructions, and allow hot components to cool before connecting the equipment.
Where do you connect a smoke machine to find a vacuum leak?
Use an approved intake or manifold connection that reaches the suspected circuit. Account for check valves, PCV passages, and branches that may need separate testing.
Can a smoke leak detector find an EVAP leak?
Yes, with compatible equipment and the correct vehicle-specific setup. Required pressure, test medium, connection point, and purge or vent valve positions must be established first.
What is the difference between Air Mode and Smoke Mode?
Air Mode supplies air without smoke and can support testing with appropriate measurement equipment. Smoke Mode introduces visible smoke to help locate leakage paths.
Why does a smoke test show no leaks when the car still has symptoms?
Smoke may not have reached the fault, or the leak may occur only under heat, vacuum, boost, or movement. Verify the setup and continue diagnosis using service information and scan data.
Can you use an automotive smoke machine to test a cooling system?
Only where the equipment instructions and vehicle procedure permit it. Smoke testing does not replace a cooling-system pressure test or other checks for internal coolant leakage.
Get an SD304 Quotation
For workshop purchases, distribution or OEM orders, contact SOLARY for an SD304 quote. Include quantity, destination and intended applications so we can confirm configuration and accessory requirements.