
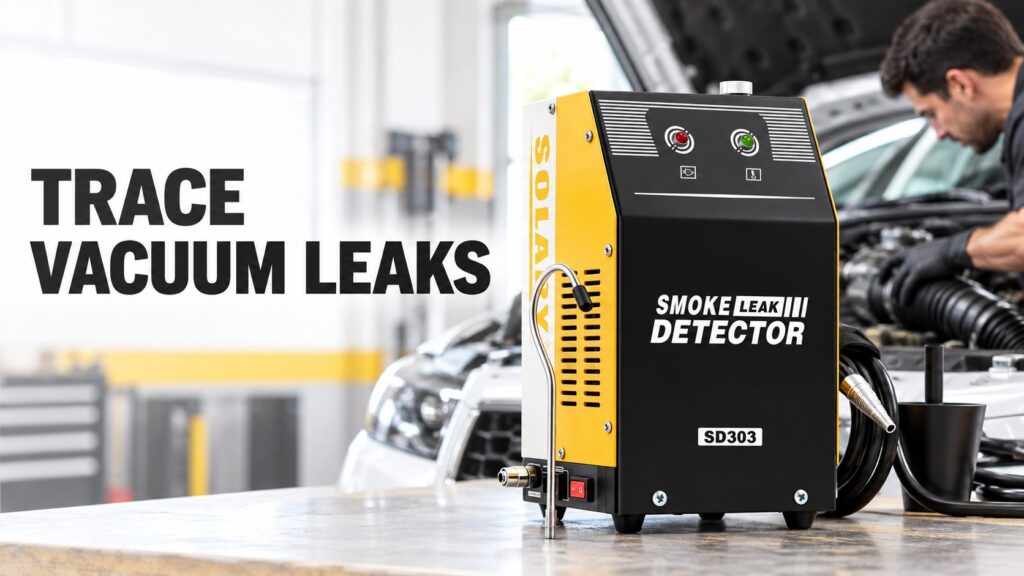
A rough idle, a faint hiss or a recurring lean code can point you toward an intake leak, but none tells you exactly which part to replace. A smoke test helps turn that suspicion into a visible inspection point.
To find a vacuum leak with a smoke leak detector, turn the engine off, connect the detector to an appropriate intake or vacuum-system access point, seal the openings required by the vehicle’s service procedure, and introduce smoke at the specified test pressure. Inspect hoses, fittings, seals, and manifold joints for escaping smoke, then repair and retest the affected area.
The important part of how to find a vacuum leak with a smoke leak detector is controlling where the smoke travels. An open intake connection, an incorrectly isolated PCV circuit, or an unsuitable test pressure can produce misleading results.
A smoke leak detector is a diagnostic tool that introduces visible smoke into a vehicle system to help technicians locate openings. It makes hidden leak paths easier to inspect, but the technician still needs to determine whether an opening is abnormal and relevant to the complaint.
What Is a Vacuum Leak?
A vacuum leak is an unintended opening that allows air into a circuit normally operating below atmospheric pressure. In engine diagnosis, this commonly involves the intake manifold, connected vacuum hoses, or related components.
On many mass-airflow-equipped gasoline engines, air entering downstream of the mass airflow sensor bypasses normal measurement. The engine control module may add fuel to compensate, potentially producing positive fuel trims, unstable idle, or lean fault codes.
Typical inspection points include:
- Intake manifold gaskets and throttle-body seals.
- Split vacuum hoses and loose connections.
- PCV hoses, fittings, and valve assemblies.
- Brake booster hoses and check-valve connections.
- EVAP purge plumbing connected to the intake.
- Injector seals, where the engine design makes them relevant.
A lean code does not establish that a vacuum leak exists. Fuel delivery problems, inaccurate airflow measurement, and other faults can produce similar symptoms.
When Should You Smoke Test the Intake System?
An intake smoke test is useful when symptoms or preliminary checks suggest unwanted airflow and a visual inspection has not located the cause.
Common reasons to test include rough idle, a hissing sound, recurring lean codes, or fuel trims that are more positive at idle than at a higher engine speed. The pattern is a clue, not a verdict: GM diagnostic guidance identifies both vacuum leaks and airflow-measurement issues among possible explanations for this behavior.
Before connecting equipment, record the fault codes, freeze-frame data, and relevant operating conditions. Check for obvious disconnected hoses, damaged intake ducts, and recent repair work.
For a broader explanation of where visible smoke helps diagnosis, see Is the Smoke Leak Detector Really Useful?
Prepare the Vehicle and Test Equipment
A useful smoke test begins with the vehicle’s service information. Confirm the permitted connection point, test pressure, isolation procedure, and any required valve commands.
Have the following ready:
- An automotive smoke leak detector suitable for the circuit.
- Correct adapters, plugs, and caps.
- Approved smoke fluid.
- A bright inspection light and, when helpful, a mirror.
- A scan tool for diagnosis and repair verification.
- Pressure regulation and measurement appropriate to the specified procedure.
The SOLARY SD303 Smoke Leak Detector uses Smoke Mode and a built-in air pump in a compact design. These features support workshop testing, but circuit compatibility and safe test pressure must still be checked before connection.
Perform the static smoke test with the engine off and sufficiently cool. Work in a ventilated area, keep ignition sources away, and follow the detector’s operating instructions.
Do not assume that a machine’s available output is an acceptable pressure for every vehicle system. Sensitive circuits may require additional regulation or different equipment.
How to Find a Vacuum Leak with a Smoke Leak Detector: Step-by-Step
1. Define the Circuit You Want to Test
Decide whether you are checking the intake assembly, a specific vacuum branch, the PCV circuit, or another connected system.
This matters because smoke can move through several connected passages. Filling everything at once may create exits that are difficult to interpret.
For example, when investigating a rough idle, start with the intake and its vacuum connections. If the evidence points toward purge plumbing or the brake booster branch, test that section separately using the approved procedure.
Define the circuit before disconnecting anything, and note each connection that must be restored afterward.
2. Choose the Correct Smoke Entry Point
Use a connection point identified by the vehicle’s service procedure. Depending on the engine and test scope, this may involve an intake adapter or an appropriate manifold vacuum connection.
Position the connection so smoke can reach the suspected leak. A closed valve or throttle plate may restrict distribution, so check the prescribed setup instead of forcing components open.
Do not introduce smoke through a sensor opening merely because it is accessible. Confirm that the adapter fits correctly and that the connection will not damage the sensor, housing, or seals.
3. Seal Required Openings and Isolate Connected Branches
Seal the openings needed to contain smoke within the selected circuit.
Depending on the procedure, this may involve an intake opening or a disconnected connection. Use correctly sized plugs and adapters, and inspect the test connections themselves for leakage.
PCV and EVAP purge connections deserve particular attention. Smoke passing through one of these paths may reflect valve position or system design rather than a damaged intake component.
Isolate branches only as directed. Avoid crushing molded plastic tubing or forcing plugs into fragile fittings. Record any disconnected brake booster connection and restore it before operating the vehicle.
4. Introduce Smoke at the Specified Pressure
Connect the detector to its intended power source, check the fluid level according to its manual, and confirm that the hose and adapter are secure.
The SD303 is a smoke-mode model. Any pressure-based assessment requires suitable regulation and measurement; smoke visibility alone does not establish the actual circuit pressure.
Introduce smoke according to the equipment instructions and allow it to reach the selected circuit. Avoid increasing pressure simply because no smoke appears immediately.
Crankcase testing needs particular care. Volkswagen service guidance specifies a limited-pressure smoke procedure and explicitly warns against applying shop air to the crankcase.
5. Inspect the Entire Test Area
Use a bright light and inspect methodically. Follow each hose to its connection rather than scanning only the most accessible components.
Pay attention to:
- The underside of intake hoses.
- Elbows near hot engine components.
- Hose ends concealed behind the manifold.
- Manifold-to-cylinder-head joints.
- Throttle-body mounting surfaces.
- PCV fittings and purge-line connections.
- Vacuum distribution fittings and unused ports.
Look for a consistent smoke trail originating from a specific point. Smoke can drift across the engine compartment, so trace it back to its source before identifying the failed component.
A small plume may become easier to see against a dark background or with the light positioned behind it.
6. Separate a Vehicle Leak from a Setup Leak
If smoke appears around the adapter, cap, or detector hose, correct the setup first. A leaking test connection can prevent smoke from reaching a smaller vehicle leak.
If smoke exits through a connected system, review the circuit layout and valve position. Do not automatically replace a purge valve or PCV component because smoke reaches that path.
Where the service procedure allows, isolate and retest the suspect branch. This helps distinguish a local fault from smoke traveling through a normal connection.
7. Repair, Retest, and Verify Operation
Repair the confirmed fault using the correct component and installation procedure. Then repeat the smoke test with the same approved setup.
Remove every temporary plug and cap. Reconnect hoses, sensors, intake ducts, and any safety-related vacuum connections.
Restart the engine only after restoring the vehicle. Compare idle quality and scan data with the original observations, following the manufacturer’s requirements for clearing codes or resetting adaptations.
A repair is complete when both the leak check and the operating checks support it.
How to Interpret Smoke Test Results
Escaping smoke identifies an opening. Whether that opening explains the complaint depends on its location, system design, and operating conditions.
| Observation | Possible explanation | Next action |
|---|---|---|
| Smoke at a split hose or loose fitting | An external leak in the tested circuit | Inspect, repair, and retest |
| Smoke around the test adapter | Inadequate test sealing | Correct the connection before diagnosis |
| Smoke entering a PCV or purge branch | A connected passage, valve position, or component fault | Check the circuit-specific procedure |
| Little smoke reaches the suspected area | A restriction, closed valve, or setup problem | Confirm the connection and smoke path |
| No visible external smoke | No leak under these test conditions, or an intermittent/internal problem | Continue diagnosis using operating data |
A smoke-free static test does not rule out every vacuum leak. Some seals change with temperature, and some components leak differently under engine vacuum than under positive test pressure.
Practical Tips for More Reliable Vacuum Leak Detection
Inspect Small, Hidden Connections
A large split is usually easy to find. A cracked elbow behind the intake manifold can be much less obvious.
Move the inspection light, use a mirror, and inspect from different angles. Do not touch hot components or disturb a connection so aggressively that you create a new leak.
Use Approved Smoke Fluid
Use the fluid specified for the detector. An unsuitable fluid can affect operation and leave unwanted residue.
SOLARY’s article on what oil to use in an EVAP machine provides additional background, but the operating manual for your specific equipment should determine fluid selection.
Treat Intermittent Complaints Separately
A cold, engine-off test may not reproduce a leak that develops after a heat cycle or when a hose moves under load.
If the smoke test is inconclusive, compare the complaint with temperature, engine speed, and load data. Follow the vehicle’s additional diagnostic checks instead of repeatedly increasing smoke pressure.
Avoid Flammable Spray Shortcuts
Spraying combustible chemicals around a running engine introduces an ignition hazard and can make results difficult to interpret. A properly configured smoke test provides a visible inspection method without relying on that approach.
Vacuum, EVAP, and Turbo Tests Require Different Setups
An automotive smoke machine can support several diagnostic tasks, but the setup must match the system.
Vacuum leak detection focuses on the intake and connected vacuum circuits. EVAP leak detection checks the fuel vapor containment system and may require specific valve commands, adapters, and test conditions.
A turbo system introduces another distinction. Some charge-air leaks appear only under boosted pressure, so a low-pressure static test may not reproduce them. Bosch’s turbo leak-testing guidance distinguishes higher-pressure turbo testing from conventional low-pressure leak testing for this reason.
Exhaust smoke testing also requires its own connection and inspection procedure. Likewise, cooling-system testing and liquid-fuel-system diagnosis should not be treated as ordinary intake smoke tests.
Use equipment, test media, and pressure controls approved for the particular circuit.
Choosing Smoke Testing Equipment for an Auto Repair Shop
For an auto repair shop, useful equipment features include clear smoke visibility, convenient connections, portability, and straightforward operation. Pressure compatibility matters just as much as those practical features.
The SD303 catalogue lists Smoke Mode and a built-in air pump. It does not list separate Air and Smoke modes or a pressure gauge. Confirm the supplied specification and any additional pressure-control requirements before selecting equipment.
Before purchasing, review the required adapters, operating instructions, and system-specific limitations. Overheat protection does not replace correct fluid use or the prescribed operating procedure.
Distributors and workshop equipment suppliers can assess the SD303 against the vehicle types and diagnostic procedures their customers handle most often.
Conclusion
Knowing how to find a vacuum leak with a smoke leak detector starts with defining the circuit, choosing the correct connection, and controlling the test pressure. Follow the smoke to its source, separate normal pathways from faults, and verify the repair through both retesting and engine operating data.
For workshops and equipment buyers evaluating an automotive smoke leak detector, the SOLARY SD303 provides practical smoke-testing features in a portable format. Review its product information and contact SOLARY to discuss equipment requirements or B2B supply inquiries.
Frequently Asked Questions
Can a smoke leak detector find a vacuum leak?
Yes. It can reveal openings in intake hoses, manifold joints, seals, and connected vacuum circuits by making escaping smoke visible. Correct setup is essential, and some temperature- or vacuum-dependent faults require additional checks.
Where do you connect a smoke machine to find a vacuum leak?
Connect it to the intake or vacuum access point specified in the vehicle’s service information. The correct location depends on the circuit being tested and whether valves or other components restrict the smoke path.
Should the engine be running during an intake smoke test?
For the static procedure described here, the engine should be off and sufficiently cool. Restart it after removing the equipment and restoring all connections to verify idle quality, fuel trims, and other operating conditions.
Can the same smoke machine test vacuum and EVAP leaks?
Potentially, if the equipment is suitable for both systems. EVAP testing has its own pressure, connection, and valve-control requirements. Confirm compatibility and follow the vehicle procedure before connecting the machine.
Does no visible smoke mean there is no vacuum leak?
No. A leak may occur only when hot, under vacuum, or in a particular component position. Also check that smoke reached the suspected area and that the test setup was sealed correctly.
Is a vacuum leak the only cause of a lean code?
No. Fuel delivery faults, airflow-sensor errors, and other conditions can also cause lean codes. Use fault data, operating checks, and the smoke test together before selecting a repair.
Discuss Your Workshop Requirements
Request an SD303 quotation for workshop use, wholesale supply or OEM packaging. Share quantity, destination and intended vehicle applications so SOLARY can confirm configuration and accessories before ordering.