
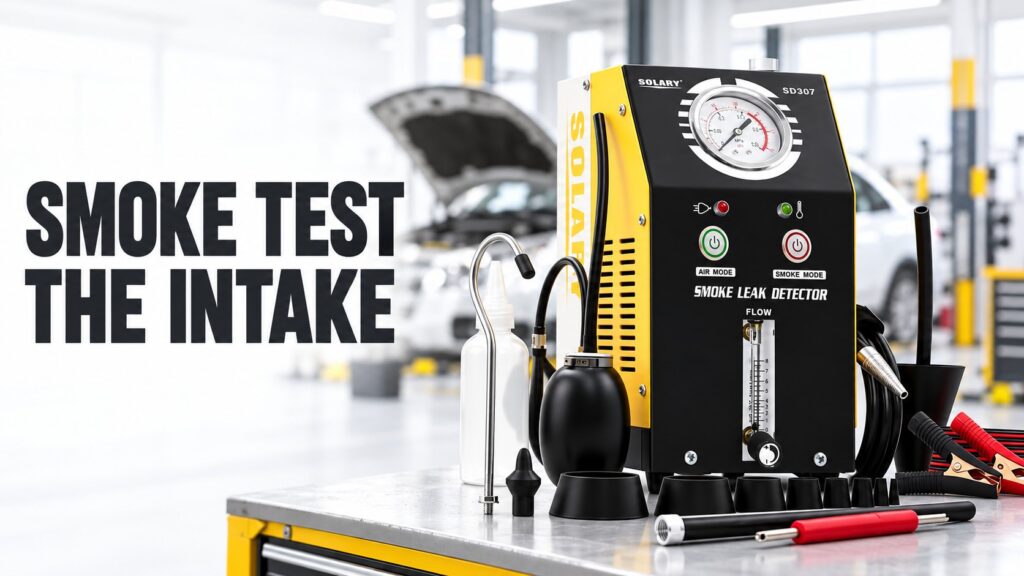
A rough idle can send a workshop through a long list of possible causes. A controlled smoke test helps narrow the search by making an intake leakage path visible before you replace another hose or gasket.
To smoke test a car for vacuum leaks, shut off the engine, connect a compatible automotive smoke machine to an approved intake or manifold access point, and prepare the circuit according to vehicle service information. Introduce smoke at the prescribed test pressure, trace any smoke escaping from unintended openings, then repair and repeat the test.
The most important part is deciding what belongs inside the test area. PCV plumbing, purge connections, brake booster check valves, and throttle position can change where smoke travels. A poor setup can hide a leak or make a normal passage look like a failed component.
This guide focuses on engine intake and vacuum leak diagnosis: where to connect, what to inspect, how to interpret the result, and how to confirm that the repair addressed the original complaint.
What Is a Vacuum Leak in a Car?
A vacuum leak is an unintended air path into a circuit that normally operates below atmospheric pressure. In an engine intake system, that path can admit air that the engine control system did not account for as intended.
Common sources include cracked hoses, loose fittings, damaged intake manifold gaskets, and faults in connected PCV or vacuum-operated components. The exact effect depends on the engine design and location of the leak.
A smoke machine applies a controlled test condition with the engine off. Visible smoke leaving a normally sealed connection reveals a leakage path, even though air may move inward through that same opening while the engine is running.
When Does a Vacuum Leak Smoke Test Make Sense?
Smoke testing is useful when inspection and scan data suggest an intake air leak. It should answer a diagnostic question, rather than replace the initial checks.
- Rough or unstable idle.
- Suspected unmetered air downstream of a mass airflow sensor.
- Lean fuel-trim behavior that warrants an intake leak check.
- A hissing sound near a hose, fitting, or manifold.
- Symptoms after intake, PCV, or vacuum hose work.
- A suspected gasket leak that cannot be located visually.
Lean codes such as P0171 or P0174 are clues, not proof of a vacuum leak. Fuel delivery problems, sensor errors, and other faults can produce similar diagnostic evidence. Read the vehicle-specific diagnostic procedure before replacing parts.
Use Fuel Trims to Guide the Inspection
On many engines, a fixed intake air leak has a greater proportional effect at idle than at higher airflow. Fuel trims that improve as engine speed increases can support the suspicion of a vacuum leak, but this pattern is not universal.
Record the conditions before testing: engine temperature, idle behavior, relevant codes, and fuel trims. Compare the results after repair under similar conditions. Avoid declaring a repair successful solely because the engine sounds better.
Equipment Needed for a Vacuum Leak Smoke Test
- An automotive smoke leak detector suitable for the application.
- Manufacturer-approved smoke fluid.
- The specified power source.
- Adapters that fit the selected intake connection.
- Plugs and caps for the openings identified in the procedure.
- A flashlight and inspection mirror.
- Vehicle service information and a scan tool.
- Appropriate pressure regulation and measurement where required.
The SOLARY SD307 Smoke Leak Detector combines a built-in air pump, Air and Smoke modes, and pressure monitoring. These features support compatible intake and vacuum testing, but the vehicle procedure still determines the connection, isolation, and permitted test pressure.
For an overview of smoke testing applications, see Is the Smoke Leak Detector Really Useful? Fluid choice also matters; review What Is the Right Oil to Use in an EVAP Machine? alongside the instructions for your actual tester.
Where Do You Connect a Smoke Machine for Vacuum Leaks?
Connect at an approved point that gives smoke access to the suspected circuit. An intake adapter or suitable manifold vacuum connection may be used when permitted by the vehicle procedure.
There is no single connection that works for every car. Connecting upstream of a closed throttle may not provide the same coverage as connecting directly to the manifold. A check valve can also keep a connected branch outside the test.
| Suspected area | Setup consideration | What to verify |
|---|---|---|
| Intake manifold and gasket joints | Use an approved path into the manifold | Smoke reaches the manifold and relevant attached passages |
| Intake duct downstream of the airflow meter | Use a suitable intake adapter and prescribed isolation | Duct joints and smaller hose connections are included |
| PCV hoses and fittings | Map the route between intake and crankcase | Normal PCV flow is distinguished from external leakage |
| Brake booster vacuum branch | Account for the check valve and component test instructions | The branch is actually exposed to the required test |
| Purge connection to the intake | Establish the required purge valve state | Smoke does not enter an unintended connected circuit |
Do not force an electronic throttle plate or use a fragile sensor fitting as a convenient adapter point. Follow service information for access and throttle control.
How to Smoke Test a Car for Vacuum Leaks: Step by Step
1. Inspect Before Connecting the Tester
Look for disconnected hoses, split elbows, loose clamps, and recent repair work. Check the underside of flexible intake ducts, where cracks can be difficult to see.
If a clear defect is found, document it and decide whether smoke testing is needed to confirm additional leakage. Replacing the first damaged hose does not establish that the rest of the circuit is intact.
2. Prepare an Engine-Off Test
Park securely and shut off the engine. Allow hot components to cool, provide ventilation, and keep ignition sources away from any fuel vapor exposure.
Prepare the smoke machine with its approved fluid and power supply. Check the test hose for damage or restriction. Avoid improvised fluids and do not exceed the manufacturer’s fill instructions.
3. Define and Isolate the Test Circuit
Identify which intake openings need sealing and which connected branches should remain in the test. Follow the vehicle procedure for PCV, purge, and other vacuum connections.
Keep a written count of temporary caps and plugs. This simple step helps prevent a blocked hose or forgotten plug when the vehicle is restored.
4. Attach the Adapter and Confirm Test Pressure
Fit the adapter securely without stretching or damaging the connection. Use the vehicle’s prescribed test pressure and a compatible regulated setup.
A machine’s maximum output pressure is not a safe setting for every intake or vacuum component. If you cannot establish compatibility, select equipment and a procedure that meet the vehicle requirements.
5. Introduce Smoke and Verify Coverage
Start smoke delivery according to the equipment instructions. Confirm that smoke reaches the intended circuit before treating an absence of visible leakage as a result.
Inspect the adapter first. Leakage at the test connection wastes smoke and can prevent useful coverage of the vehicle system.
6. Inspect from the Connection Outward
Follow each hose and joint systematically. Use a light at different angles to reveal faint streams, especially behind brackets and around gasket edges.
Trace smoke to its source. A plume drifting over the manifold does not necessarily originate at the manifold gasket. Check nearby elbows and hose connections before assigning the fault.
7. Repair, Retest, and Restore
Repair the confirmed leakage path and repeat the same test. Maintain comparable connection points and approved test conditions so the before-and-after result is meaningful.
Remove all temporary plugs and reconnect every hose and connector. Start the engine only after restoring the system, then compare scan data and operating behavior with the original complaint.
Common Vacuum Leak Locations to Check
Vacuum Hose Elbows and Plastic Fittings
Small elbows can split underneath while appearing sound from above. Inspect the full circumference of each fitting. Gentle movement may reveal an intermittent opening, but avoid forcing brittle plastic.
Intake Manifold and Throttle-Body Seals
Inspect gasket edges and flange joints. Smoke at one point may identify the exit of a leakage path without revealing its full extent. Use the vehicle’s repair instructions to assess the sealing surfaces and fasteners.
PCV Plumbing
PCV systems connect crankcase ventilation to the intake through controlled passages. An external hose crack is different from smoke traveling through a normal PCV route.
Smoke at an oil filler opening does not automatically prove an intake gasket failure. Check the ventilation layout and test the suspected component using the appropriate procedure.
Brake Booster and Purge Branches
A brake booster check valve may prevent a general intake smoke test from reaching the booster. An internally leaking purge valve may also require a separate sealing or functional test.
Do not assume that every connected component was tested simply because the manifold received smoke. Document which branches were included and which need separate checks.
How to Read the Smoke Test Result
| Observation | Interpretation | Next check |
|---|---|---|
| Smoke leaves a split hose | External leakage under the test conditions | Repair and retest the circuit |
| Smoke escapes at the adapter | The test connection is not sealed | Correct the setup before diagnosing vehicle parts |
| Smoke travels into the crankcase | A connected ventilation route may be open | Review PCV routing and required isolation |
| No smoke reaches a branch | A check valve or obstruction may exclude it | Test the branch separately if required |
| No external smoke appears | No visible leak found in the tested area under these conditions | Verify coverage and investigate other causes |
Smoke testing locates leakage paths. It does not independently measure the effect of each path on fuel trims, prove that a sensor is accurate, or rule out a fuel supply problem.
Why a Car Can Still Have a Vacuum Leak After a Negative Smoke Test
A negative result is only useful when the setup is valid. Check that the machine produced smoke, the hose was unobstructed, and the selected connection reached the suspected area.
Some faults change with temperature or component movement. A seal may behave differently under inward vacuum than under the outward pressure used in a smoke test. Follow the vehicle’s additional diagnostic checks when the complaint remains.
If the intake test is sound, widen the diagnosis rather than adding pressure. Review fuel delivery, sensor plausibility, purge operation, and other causes suggested by the scan data.
Practical Tips for Professional Workshops
- Record the test connection and isolated branches on the repair order.
- Inspect low-cost hoses and fittings before condemning major assemblies.
- Photograph the exact smoke exit point.
- Retest after every confirmed repair.
- Compare fuel trims under similar conditions after reassembly.
- Keep adapters organized so the correct connection is easy to identify.
When evaluating a professional smoke leak detector for vacuum testing, discuss the intended vehicle applications, adapter needs, and pressure compatibility with SOLARY. Equipment selection should match the shop’s actual diagnostic procedures.
Conclusion
Knowing how to smoke test a car for vacuum leaks means more than filling the intake with smoke. Define the circuit, use an approved connection and test pressure, inspect the actual leakage path, and verify the repair with both a repeat test and relevant operating data.
Repair shops, distributors, and workshop equipment suppliers can review the SD307 automotive smoke testing equipment and contact SOLARY to discuss application requirements and purchasing needs.
Frequently Asked Questions
Can a smoke machine find an intake manifold gasket leak?
It can reveal an external leakage path when smoke reaches the affected manifold area and the test conditions are appropriate. Confirm the exact source before replacing the gasket.
Should the engine run during a vacuum leak smoke test?
The procedure described here is an engine-off test. Follow the vehicle and equipment instructions, then restore the circuit before starting the engine for operational checks.
Do I need to block the PCV hose?
That depends on the engine layout and test objective. Follow service information; blocking it without a plan may exclude a component you intended to test.
Can a vacuum leak cause P0171 or P0174?
It can contribute to lean conditions, but those codes do not prove a vacuum leak. Use scan data and the vehicle diagnostic procedure to distinguish other causes.
How much pressure should I use to smoke test an intake?
Use the pressure specified by the vehicle manufacturer with compatible equipment. Do not apply the machine’s maximum output as a universal setting.
Does no visible smoke mean there is no vacuum leak?
No. Confirm smoke delivery, circuit coverage, and isolation. Temperature-dependent faults, check valves, or seals that behave differently under vacuum may require additional tests.
Request Workshop Supply
Need an SD307 for your workshop or a bulk order for distribution? Request an SD307 quotation with your quantity, destination and adapter requirements. Ask SOLARY to confirm the supplied configuration for your intended applications.